


Showing posts with label DO-IT-YOURSELF. Show all posts
Showing posts with label DO-IT-YOURSELF. Show all posts
Jan 22, 2015
Every homeowner likes to think
that they are the DIY master of the renovation world, but sometimes
– whether they want to admit it or not – homeowners are not as good with power
tools as they think they are. It is important to know when to step back and ask
for help, which is why Edmonton Renovation Show presenter Jamie Banfield of
Jamie Banfield Design has given us the do’s and don’ts of bringing in an
expert. Hint: spending a little extra on a designer might actually save your
budget!

If you have a full vision for your renovation, if you understand products and know where you need to go, Jamie suggests bringing in a designer because they can get you discounts that you would likely never snag as a consumer.
"Designers typically will take 7-10% of what typical renovation budgets should be, but those designers can fight for discounts, know when to buy thing/when there are sales going on, and know what areas to put cash into."

Jamie also says that good designers will have contacts for trades, whether it's a dry-waller or cabinet installer. Even if you're a self-proclaimed handyperson, hiring a designer could potentially nab you some great deals on products and installation.

"If you cheap out on the install you could spend $20,000 on cabinets, save $2,000 by doing the installation yourself, and the whole thing will look terrible. Or you could buy a $5,000 kitchen and spend $1,500 on the installation, and just by having it installed correctly, it'll look like a million bucks."
For The DIY Master
If you have a full vision for your renovation, if you understand products and know where you need to go, Jamie suggests bringing in a designer because they can get you discounts that you would likely never snag as a consumer.
"Designers typically will take 7-10% of what typical renovation budgets should be, but those designers can fight for discounts, know when to buy thing/when there are sales going on, and know what areas to put cash into."
Jamie also says that good designers will have contacts for trades, whether it's a dry-waller or cabinet installer. Even if you're a self-proclaimed handyperson, hiring a designer could potentially nab you some great deals on products and installation.
For The Not-So-Renovation-Savvy
If you're a renovation newbie, Jamie highly recommends bringing in a designer because they'll know what steps to take and what steps not to take in terms of how to make the most of your new space.
"Professionals can help homeowners make better choices. Designers understand the details going together. They'll know that the countertops are going to be installed on Tuesday, and the plumber is coming on Wednesday. Whereas a lot of consumers won't have that plan of attack."

Designers think of the right planning and logistical aspects of a renovation project, which is definitely something that many consumers don't really consider. If you're just getting started in the renovation world, professional help is key to saving time and money.
Overall, Jamie says the most efficient way to save your renovation budget is to put the most attention on installation. Let's say you're redoing your kitchen and you've decided the best way to save money is to install the cabinets by yourself. This could actually lead to costly mistakes and sloppy handywork.
Calling in experts can save you money, and Jamie has a million tricks up his sleeve to help you create an elegant space on a tight budget. Check out his presentations at the Edmonton Renovation Show, January 23 - 25, to find all the tips you'll need to get started on your project!

JANUARY 23 - 25, 2015.
JANUARY 23 - 25, 2015.
EDMONTON EXPO CENTRE
Oct 3, 2013
.jpg)
This year at the Deseret News Home Show, we'll be bringing you some fabulous do-it-yourself ideas! Come check out our skilled experts on stage, they'll inspire you to decorate, renovate, and refresh your home both simply and creatively!
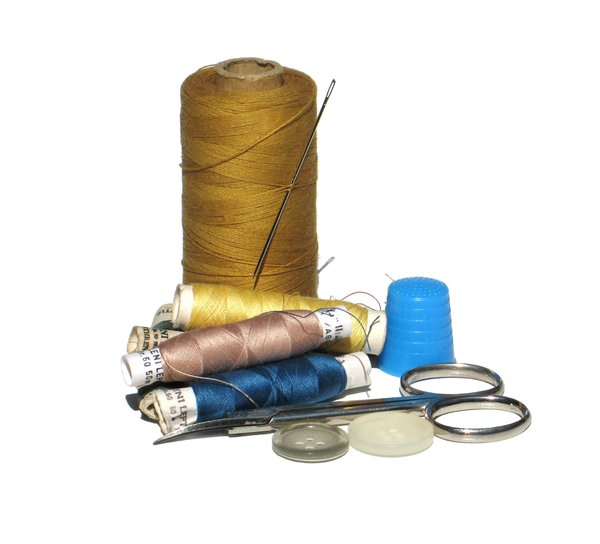
To prepare you for the show, we're bringing you a tutorial for these darling fabric pumpkins. Fun and easy to make, the key to making these is to pick unexpected fabric combinations that will really pop in your home.
Here’s what you need:
To prepare you for the show, we're bringing you a tutorial for these darling fabric pumpkins. Fun and easy to make, the key to making these is to pick unexpected fabric combinations that will really pop in your home.
Here’s what you need:
- Fabric
- Scissors
- Straight edge ruler
- Yarn
- Embroidery Floss
- Tape measure
- Polyester Fiberfill
- Embroidery needles
- Long embroidery needle
- Sewing machine (optional)
- Hot glue gun (optional)
Directions:
The size of your fabric should be twice as long as it is wide.. i.e. a 6"x12", or a 9"x18", etc. I made some very small pumpkins and my largest is a finished size of around 12"x12". A grouping of several sizes makes for a great table centerpiece, or put them on a shelf, etc.\
Once you've cut your fabric, fold it in half so that the wrong side of the fabric is on the outside.
Sew down the side opposite the fold.
Use a longer stitch to sew along one of the other open sides so you can gather the fabric to close that end.
Flip fabric right side out and stuff with polyester fiberfill (the pumpkins look better the fuller they are).
Hand stitch/gather shut the remaining open end.
To create the creases/sections found in real pumpkins, use yarn or embroidery floss.
Stick your needle with the yarn or embroidery floss in the center of the pumpkin and pull needle through to the other side.
Now you're going to pull your needle and yarn down and back through the bottom of your pumpkin, and repeat all the way around (I did this 3-4 times depending on the size of the pumpkin). Up through the bottom, through the top, back down and up through the bottom, through the top, etc.
Pull tightly as you go around. The tighter you pull; you'll get more defined the "sections" around your pumpkin will be.
When you have created your desired amount of sections, tie off the yarn or embroidery thread.
To create a stem, simply take a different/contrasting fabric and sew a stem shape (“U” shape) with the right sides of the fabric together. The fatter the stem, the easier it will be to flip right side out and fill with Polyester Fiberfill.
Turn stem right side out and fill, then stitch the open end of stem shut. Hot glue or stitch the stem to the pumpkin.
_____________________________________
FOR 2-FOR-1 TICKETS TO THE SHOW CLICK HERE & SAVE!

OCTOBER 11-13, 2013
SOUTH TOWNE EXPO CENTER
Apr 24, 2013
What's trending right now? DIY crafts for your outdoor space! I've gathered some of my favourites to inspire you to get crafty and creative outdoors. Enjoy!


10 Garden DIYs
Vertical Garden Tower, Tutorial: Million Moments
SO SIMPLE! Make a ribbon calendar for your garden seed packets. Tutorial: Better Homes & Gardens
Painted Garden Rocks (Use for Decor or Labels), Tutorial: Sometimes-Homemade
Garden Tower, Tutorial: Chase The Star
How Simple! A Skateboard Swing via Blog.MakeZine.com
Stacked Entryway Garden Feature, Tutorial: Home Jelly
Upcycled Pallet Wall Planter, Tutorial: BeersnBeans
Teacup Bird Feeder, Tutorial: Intimate Weddings
Neon Corner Planter, Tutorial: ModernlyWed
Floating Centerpiece, Tutorial: BHG.com
So, which outdoor DIY will you be working on this weekend?
Let us know on Facebook @ Home and Garden Events
Feb 21, 2013
Whether it’s your first time attempting a do-it-yourself project, or if you’ve been at it for years, fan favourite Bryan Baeumler of HGTV’s popular renovation shows Disaster DIY, Leave it to Bryan and House of Bryan is sure to be a great resource for you.

Known for his tough love and great sense of humor, Bryan has been helping people with their renovation needs since he was 14. No question too silly, no disaster too disastrous - be sure to get yourself a front row seat and come prepared with your renovation questions!
Why do you think the idea of a do-it-yourself project is so appealing to people?
I think there are a few reasons and they vary from person to person. There are people who generally have an interest in it and enjoy doing work around the house, people who want to save money, and people want to tackle a project and have that sense of accomplishment from taking care of their own home.Do you think everyone has the ability to try a do-it-yourself project?
I think everyone can, but I don’t think everyone wants to. If you really wanted to learn to do it you could invest the time, research and practice. The best way to learn is to get a bit of theory, read the instructions, get your hands dirty and make some mistakes. Go through and learn how not to do it.What is your advice for a first time do-it-yourselfer?
Start small and affordable. It’s kind of like going to a casino; assume you’re going to have to pay someone to fix the problem for you. If you’re willing to write off the materials you purchased, that is a good place to start.What is a good project to start with?
Painting is a classic first project to get your feet wet. If you have patience, and take your time, pretty much anyone can handle painting a wall. You’ll also learn a good professional painter is worth their weight in gold.Where do folks normally get in over their heads?
One of the biggest mistakes people make is that they are optimistic about how much things will cost, how long they will take, and how much skill they will require.
__________________________
Catch master contractor Bryan Baeumler at the BC Home + Garden Show, and Toronto's National Home Show.
For 2-for-1 tickets to any of these shows click HERE.


Aug 24, 2012

Via http: Abeautifulmess
Recently found on Pinterest, I had to share this EXTREMELY easy do-it-yourself craft. This one’s cheap, quick, and fun for the whole family.
The Steps
1. Pick up some plain ceramic mugs, cups, plates, or whatever from the dollar or discount store (you don’t have to spend much on these).
2. Grab some permanent Sharpie markers (any color will work).
3. Write, draw, or design whatever you want on the ceramic (10 minutes or more depending on your design).
4. Place the craft on a cookie sheet and bake for 30 minutes at 350 degrees.
5. DONE! Be sure to cool the craft completely before using/washing.
These make for great personalized gifts & party favors!
Subscribe to:
Posts (Atom)
Popular Posts
-
 I recently discovered the coolest website EVER! Wordle.net generates free and customizable subway art in as quickly as 1 minute. Sim...
 -
 Tweet Thanksgiving and holiday entertaining is in full swing! We know you're all preoccupied planning meals and getting the ho...
 -
 It's gift giving season! As you prepare your list, consider making a few of your gifts this year. Impress your friends and family w...
 -
 Calling all bloggers, designers, and entertaining enthusiasts: we're searching for the next big name in design, entertainment, and all t...